by admin | Sep 30, 2026 | Home & Garden
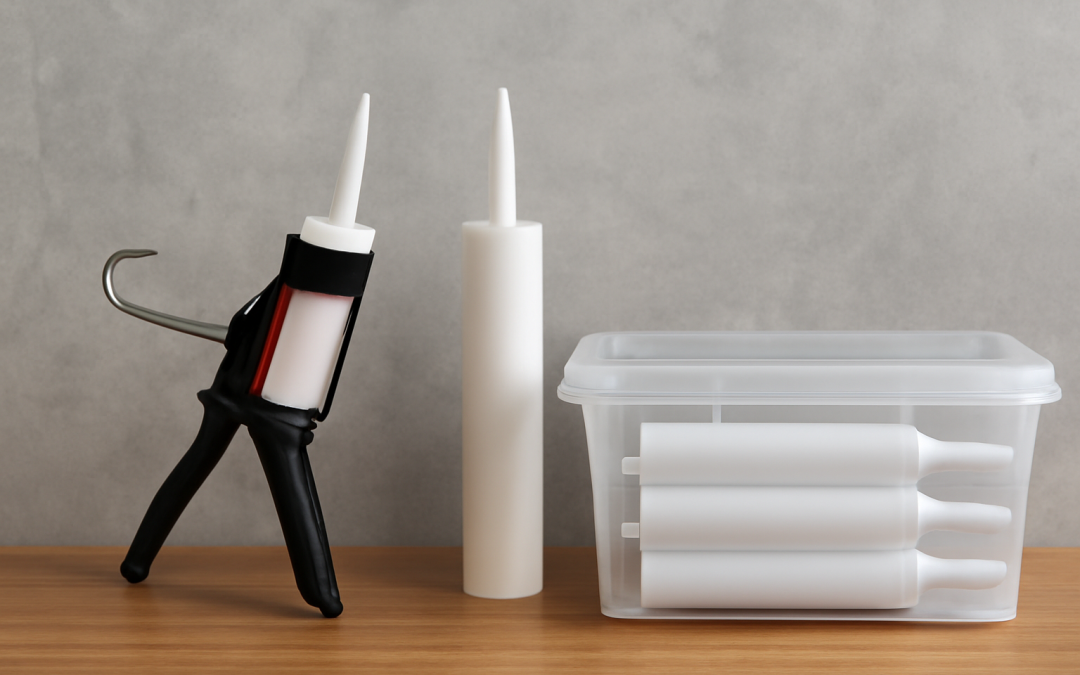
Proper maintenance and organization of tools are essential for both professional contractors and DIY enthusiasts alike, especially when it comes to items like caulk guns and sealants. These tools, while seemingly straightforward, require thoughtful storage considerations to ensure longevity, functionality, and safety. Given that sealants can dry out, harden, or become unusable if not stored correctly, taking the time to implement effective storage strategies can save considerable money and frustration in the long run.
A caulk gun, designed to dispense sealant from a tube, is an indispensable tool for numerous construction and repair projects. However, improper storage can lead to difficulties such as dried-up sealants clogging the nozzle or the mechanical parts of the gun becoming rusty or stuck. Storing caulk guns correctly means protecting both the gun and the sealant it holds. One of the critical factors in storage is controlling exposure to air and temperature, as these elements can change the properties of sealants drastically. When left in extreme heat or cold, sealants may separate or lose their adhesive properties. Conversely, storing caulk guns and tubes in a moderate, controlled environment can extend their usability significantly.
When sealants are not in use, ensuring the tubes are sealed properly is crucial. Air exposure is the primary cause of sealant hardening inside the tube or around the nozzle, rendering it unusable. A common method to prevent this is to squeeze out any excess air before sealing the tube. Following this, using the original cap correctly—or in some cases substituting with a small nail or wire to plug the nozzle—can keep the sealant fresh. For those seeking a more reliable long-term solution, specially designed nozzle covers and airtight storage containers provide excellent protection against air and moisture intrusion, maintaining the sealant’s pliability.
Temperature control plays an often underestimated role. Sealants vary widely in formulation, including silicone, acrylic, polyurethane, or latex bases, each with unique temperature tolerances. For instance, silicone sealants generally tolerate colder temperatures better but can still become less effective if stored below freezing. Conversely, extreme heat can accelerate curing inside the tube, wasting the product. Maintaining a storage space that remains within the sealant manufacturer’s recommended temperature range ensures the product remains stable and ready to use. Most professionals find that a cool, dry shelf in a garage or workshop, away from direct sunlight, provides an ideal environment.
Organizing caulk guns and sealants by type and frequency of use can also improve workflow efficiency and reduce wear and tear. Sealants intended for specific applications—such as kitchen and bath, roofing, or concrete—should be grouped separately to avoid mix-ups and ensure that the right product is used for the right task. Labeling storage containers or racks clearly helps maintain this order, especially in busy job sites or shared workshops. Additionally, storing caulk guns in a way that prevents accidental triggering or pressure release can stop unwanted messes and waste. Hanging guns on hooks or keeping them in a toolbox with sufficient padding not only protects them but also ensures they are readily accessible when needed.
Another aspect of effective storage that often goes overlooked is cleaning and routine maintenance. After every job, it’s essential to clean the caulk gun and remove any residual sealant that could dry and obstruct the mechanism. Simple wipes with a cloth or appropriate solvent can prevent build-up and prolong the tool’s life. Furthermore, before storing the guns for extended periods, lightly lubricating the moving parts with non-corrosive oil can prevent rust and keep the dispensing smooth. Paying attention to these small maintenance steps saves considerable effort when the gun is needed next time.
Sealant shelf life is another important consideration. Most manufacturers specify an expiration date or typical shelf life for their products. Using expired sealants can lead to poor adhesion, cracking, or shrinking once applied, which defeats the purpose of the work and may cause costly repairs. To avoid this, older tubes should be prioritized to be used first, following the “first in, first out” principle in storage management. Regularly inspecting stored sealants for signs of spoilage, such as changes in color or consistency, is a good practice that ensures no compromised product is inadvertently used.
For those with limited storage space, compact and space-efficient solutions can be helpful. Stacking crates or modular storage bins designed for tools and building supplies allow better use of vertical space and keep items contained and organized. Transparent containers or those with clear labeling reduce the time spent searching for specific items. Portable, multi-compartment storage cases allow professionals who travel to job sites frequently to organize caulk guns and sealants securely during transport, minimizing the risk of damage or spills.
Humidity control is another environmental factor that influences the quality of stored sealants. Excess moisture can penetrate packaging, especially if it is damaged or not fully sealed, potentially degrading the sealant. For water-based sealants like acrylics, this can lead to premature curing or mold growth. Utilizing airtight containers or adding desiccant packets in storage compartments can mitigate moisture risks. Ensuring the storage environment is well-ventilated and dry is equally important, particularly in locations like basements or garages prone to dampness.
In professional environments where multiple people may access tools and materials, implementing clear usage and storage protocols is beneficial. Training staff on how to store caulk guns and sealants properly and emphasizing the importance of returning items to their designated places promotes orderliness and prevents accidental damage. Documenting storage practices and regularly auditing the storage areas reduces misplacement and product wastage. This practice is particularly valuable in minimizing downtime resulting from misplaced items or the need to purchase replacements prematurely.
Some sealants, especially those that are solvent-based or contain hazardous chemicals, require additional safety measures in storage. Ensuring compliance with regulations regarding flammable materials or volatile organic compounds is essential to prevent accidents. This may involve using sealed metal cabinets or locking storage units, placing warning labels, and keeping the area well-ventilated. Proper disposal of empty or unusable sealant tubes should also be part of the overall storage and maintenance routine, following local hazardous waste guidelines.
Advancements in storage technology have introduced innovative products that enhance the preservation of both caulk guns and sealants. Vacuum-sealed containers and refrigeration units specifically designed for construction materials can extend the usable life of sensitive sealants. While these solutions may not be necessary for all users, professionals dealing with high volumes or specialty sealants may find these investments worthwhile. Additionally, some companies now offer reusable sealant tubes or cartridges that facilitate easier resealing and reduce environmental waste.
Educating oneself on the specific requirements for each type of sealant is perhaps the most important step in effective storage. Rather than adopting a one-size-fits-all approach, understanding product labels, manufacturer recommendations, and industry best practices ensures that the right conditions are applied. This knowledge enables users to extend product viability and maintain optimal performance after storage. Furthermore, it reduces the frustration associated with unusable materials, which is common when sealants are ignored or stored improperly.
In summary, a combination of proper environmental control, organized storage layouts, routine maintenance, and product-specific knowledge is key to preserving the efficiency and lifespan of caulk guns and sealants. Taking the time to implement these storage tips not only safeguards the investment in tools and materials but also helps maintain the quality and reliability of repair and finishing work. Consistency in these practices results in smoother project execution, fewer unexpected interruptions, and overall cost savings by reducing waste and replacement expenses.
Ultimately, effective storage is not just about protecting the physical tools and materials but also about enhancing productivity and professionalism in every project. Well-maintained caulk guns glide smoothly during application, and fresh, properly stored sealants ensure clean, durable bonds that withstand the test of time. Whether for a weekend warrior or an experienced contractor, adopting disciplined storage habits transforms an everyday toolkit into a well-prepared arsenal ready to tackle any sealing challenge confidently and efficiently.

by admin | Sep 29, 2026 | Home & Garden
Whether you are a professional painter or a weekend DIY enthusiast, maintaining your tools in prime condition is essential for achieving the best results and prolonging their lifespan. Paint brushes and rollers are invaluable instruments in the painting process, but they require proper care and attention to function effectively over time. Neglecting to clean and store these tools correctly can lead to hardened bristles, uneven paint application, and additional expenses. Investing time in paint brush and roller care techniques ensures that these tools remain ready for use, reducing waste and improving the quality of your work.
The foundation of proper care begins immediately after you finish using your paint brush or roller. The key to successful maintenance is to clean the tools before the paint dries, as dried paint is far more difficult to remove and can permanently damage the bristles or roller nap. If the paint is water-based, such as latex, cleaning is usually straightforward; warm soapy water is enough to break down and wash away the paint. For oil-based paints, solvents like mineral spirits or paint thinner are necessary to dissolve the resin and prevent the fibers from hardening. Promptly removing paint residues keeps the brushes soft and the roller fluffy, retaining their ideal texture for the next application.
In addition to cleaning, the method of washing the paint brush and roller is equally crucial. For brushes, gently rinsing them under running water while combing through the bristles with your fingers or a brush comb can remove most paint particles without causing damage. Avoid scrubbing aggressively or using sharp tools as this can bend the bristles or loosen the ferrule, the metal part securing the bristles to the handle. Following this, shaping the bristles back into their original form and allowing the brush to dry horizontally or hanging vertically with the bristles down will prevent warping. Rollers also require careful handling; after removing excess paint with a scraper or putty knife, they should be rinsed similarly and squeezed gently to expel paint and water without twisting or wringing, which can alter the nap’s structure.
Another important consideration for paint brush and roller care techniques is the choice of cleaning agents and tools. Using harsh chemicals not specifically designed for paint removal can damage the fibers or leave residues that affect future paint jobs. Mild dish soaps, dedicated brush cleaners, or natural options like vinegar for latex paints work best to maintain the integrity of the materials. Some painters also use specialized brush conditioners that nourish natural bristles, helping them stay supple and reducing bristle loss. When it comes to rollers, thorough rinsing to eliminate paint from within the core prevents matting and keeps the roller rolling smoothly. Additionally, investing in high-quality cleaning racks or holders can aid in thorough drying and extend the lifespan of both brushes and rollers.
Storage plays a critical role when it comes to preserving your painting tools between projects. Properly stored brushes and rollers maintain their shape and cleanliness longer, which means less prep time before the next painting session. After the tools are fully cleaned and dried, they should be stored in a clean, dry place free from dust and extreme temperatures, which can degrade the materials. Hanging brushes by their handles or laying them flat in protective cases will help prevent the bristles from bending or splaying. For rollers, storing them in airtight plastic bags or wrapping them in plastic wrap can protect the nap from drying out or accumulating dust. Avoid leaving paint brushes standing upright on their bristles or placing rollers directly on rough surfaces, as this can cause lasting damage.
If projects are interrupted and you cannot immediately clean the tools, there are interim solutions to keep paint brushes and rollers in usable condition for short periods. For brushes, wrapping them tightly in plastic wrap or aluminum foil prevents the air from drying the paint. Another way is to submerge the brush’s bristles into water or an appropriate solvent container to prevent drying, but care must be taken to not soak the wooden handle, which may swell or crack. Rollers can be sealed in plastic wrap or stored in airtight bags, sometimes with a damp cloth to preserve moisture. These temporary measures are especially helpful for multi-day painting jobs or when applying multiple coats, minimizing the need to clean tools repeatedly.
One frequently overlooked aspect in paint brush and roller care techniques is the regular inspection and maintenance of the tools themselves. Over time, natural wear and tear may cause bristles to shed or rollers to loosen. Bristle loss can lead to imperfections in the painted surface, while a compromised roller might give an uneven finish. Trimming stray or broken bristles after cleaning can keep brushes appearing neat and reduce paint flaking. For rollers, spiraling or cutting off tangled nap fibers restores their even texture and improves paint pickup. Routine inspection not only extends tool life but also ensures consistent, high-quality results for every painting task.
Customization and selection also influence maintenance routines. Different paint types, application techniques, and surfaces may require specific brush stiffness or roller nap thickness. Understanding your tools’ characteristics can guide proper care. For example, natural bristle brushes used with oil-based paints typically require solvent-based cleaning, whereas synthetic brushes paired with latex paints are easier to clean with water. Certain textured surfaces may demand specialized rollers with thick naps that collect more paint but require more meticulous cleaning due to paint retention inside the fibers. Tailoring care methods to the tools you own reduces wear and maximizes performance.
Additionally, investing in quality products often pays off in terms of ease of cleaning and durability. While inexpensive brushes and rollers may save money upfront, they often shed bristles, lose nap quality quickly, and are harder to clean thoroughly. High-grade tools employ better materials and construction that withstand repeated use and cleaning. For instance, brushes with tightly bound bristles and well-fitted ferrules won’t lose shape during washing, and rollers with dense, resilient fiber packs don’t mat easily. Following this, the combination of proper paint brush and roller care techniques and superior equipment helps attain superior finishes and long-term savings.
For painters working in environments where frequent tool cleaning isn’t feasible, alternative solutions can help reduce upkeep. For example, disposable or single-use rollers streamline cleanup, particularly for light, quick jobs. However, this approach ultimately creates more waste and can be costlier over time. Some professionals use brush storage containers that keep brushes moist and ready for use over days without drying. These systems combine moisture retention and airtight sealing to delay the need for cleaning. Though not replaceable for thorough cleaning, they are invaluable for efficiency during continuous painting.
Proper drying techniques cannot be overstated when discussing paint brush and roller care techniques. Brushes and rollers must be allowed to dry completely in a suitable environment before storage to avoid mold growth and unpleasant odors. This is particularly important if using water-based paints that may leave moisture in the fibers. Drying near sunlight or heat sources can cause premature bristle degradation, so a shaded, well-ventilated area is preferable. Some painters use racks or hooks that suspend tools to promote air circulation, expediting the drying process without risking deformation. Ensuring tools are dry before storage avoids common problems that compromise tool readiness over time.
Another advanced aspect of maintenance includes deep cleaning and restoration when tools begin showing signs of wear. Deep cleaning involves soaking brushes or rollers in specialized paint strippers or remover solutions designed for hardened paint. After soaking, gentle combing or brushing with a stiff brush helps eliminate residual paint stuck deep within the bristles or roller fibers. In cases where buildup is excessive, replacing the brush head or roller sleeve becomes necessary. Periodic deep cleaning revitalizes tools that have been neglected or subjected to heavy use, allowing extension of their service life significantly.
Environmental considerations are also associated with paint brush and roller care techniques. Proper disposal of used cleaning solvents, paint residues, and wastewater is crucial for minimizing ecological impact. Many solvents are hazardous materials that should never be poured down drains or onto soil. Instead, they must be collected and taken to designated hazardous waste disposal centers. Using environmentally friendly cleaners when possible or biodegradable soaps for water-based paints reduces toxic waste. Additionally, maintaining tools well reduces the frequency of replacement, which cuts down on manufacturing waste and resource consumption. Responsible maintenance practices not only save money but contribute positively to environmental stewardship.
In conclusion, mastering paint brush and roller care techniques is as vital as the painting itself. By promptly cleaning tools after use, employing suitable cleaning agents, drying correctly, and storing them properly, painters can preserve their equipment’s functionality and quality. Regular inspection, proper handling, and occasional deep cleaning further ensure that brushes and rollers deliver consistent performance and extend their usable life. Investing effort into tool maintenance produces not only superior finishes but also financial savings and environmental benefits. Whether undertaking a small residential project or large-scale commercial work, dedicated paint brush and roller care transforms routine tasks into professional achievements.

by admin | Sep 28, 2026 | Home & Garden
Creating a safer workspace is essential for anyone involved in do-it-yourself (DIY) projects, whether you’re a novice or a seasoned craftsman. A well-organized workbench can significantly reduce the risk of injury, streamline your workflow, and enhance overall project efficiency. Cluttered work areas not only increase the chances of accidents but also make it difficult to find tools and materials, leading to frustration and wasted time. By dedicating effort to proper workbench organization, enthusiasts can improve safety, focus better on their projects, and enjoy a more satisfying DIY experience.
One of the foundational principles of safer DIY workbench organization is ensuring that the work surface is free from unnecessary items. A clean, uncluttered workbench surface allows for better control over tools and materials, minimizing the chance of slips, trips, or accidental contact with hazardous elements like blades or hot surfaces. Establishing a habit of clearing the workspace after every project or task step encourages awareness and forces regular tidying, which in turn contributes to safety. For projects requiring multiple tools and parts, setting up designated zones on or around the bench for different items can prevent mixing hazardous tools with non-essential components.
Proper storage is another critical element of organizing a workbench for safer DIY activities. Tools, especially sharp or heavy ones, should have designated storage spots that are both easily accessible and secure. Hanging tools on pegboards or storing them in labeled drawers can keep them off the work surface, reducing clutter and preventing accidental knocks or drops. When storing power tools or electrical equipment, it is important to ensure that cords are neatly coiled and kept away from work areas to avoid tripping hazards. Additionally, hazardous materials such as paints, solvents, or adhesives should be stored separately, ideally in a locked cabinet or away from the main workspace to avoid spills and accidental exposure.
Lighting plays an often overlooked role in workbench safety and organization. A well-lit workspace helps DIY enthusiasts clearly see what they are working on, reducing the likelihood of mistakes that may lead to injury. Installing overhead lights along with adjustable task lighting can illuminate difficult angles or detail-oriented tasks. Natural light, when available, should also be maximized by situating the bench near windows or well-lit areas. Inadequate lighting can cause eye strain, increase errors, and result in accidents, making proper illumination a vital component of safer workbench organization.
Maintaining order extends beyond the placement of tools and lighting, encompassing the effective management of dust and debris. Sawdust, metal shavings, and other fragments can create slippery surfaces or become airborne irritants, jeopardizing safety. Regularly cleaning the workbench and surrounding floor area reduces these hazards. Using dust collection systems or shop vacuums during and after projects helps contain particles and improves air quality. Furthermore, placing mats or anti-fatigue pads around the workbench reduces the risk of slipping, especially if any dust or spills occur.
Proper organization also means creating a systematic approach to tool use and maintenance. Tools that are regularly inspected and kept in good working condition decrease the risk of malfunction-related injuries. Sharp blades, tight grips on handles, and efficiently functioning power tools all contribute to safer DIY practices. Incorporating a maintenance schedule into your routine ensures that all equipment stays reliable and reduces the chances of unexpected accidents. Moreover, organizing tools by type or frequency of use allows quick access, reducing excessive reaching or awkward body positions which could result in strains or repetitive stress injuries.
Another important aspect is thoughtful layout design to prevent accidents and improve workflow. Arranging frequently used tools and materials within arm’s reach limits unnecessary movement that might cause balance loss or accidental tool drops. Heavier items should be stored lower to avoid injuries from lifting or dropping, while lighter tools can be placed higher. The bench height itself should be ergonomically suitable — typically around waist level — to prevent back strain during extended work sessions. Creating dedicated spaces for hazardous steps such as cutting, sanding, or gluing ensures that these activities happen in controlled zones, minimizing cross-contamination and unintentional injury.
Safety gear and first aid also benefit from strategic workbench organization. Ensuring that personal protective equipment such as gloves, glasses, ear protection, and dust masks are readily accessible and stored near the workspace encourages frequent use. A visible and well-stocked first aid kit should be located within easy reach to quickly manage minor injuries like cuts or burns. Encouraging a mindset where safety equipment is an integral part of the workspace helps embed cautious habits and prevents the kind of casual neglect that might lead to accidents during complicated tasks.
A well-organized workbench fosters a disciplined approach to project planning and execution. When tools and materials are clearly arranged, it becomes easier to visualize each project phase and identify potential hazards before starting. For instance, knowing exactly where your clamps, measuring devices, or finishing supplies are can reduce the stress that leads to rushed actions or oversight. Additionally, maintaining a dedicated spot for manuals or project plans on or near the workbench informs safer decision-making by keeping reference materials at hand during complex procedures, helping to ensure that safety protocols are followed closely.
Digital organization tools can complement physical workbench setups in improving safety and efficiency. Keeping an inventory list on a smartphone or tablet helps track tool conditions, availability, or replacement needs, preventing last-minute rushes that can increase accident risk. Digital reminders for preventive maintenance or restocking safety supplies offer another layer of preparedness. When paired with a tidy and well-planned workspace, these organizational methods create a holistic safety environment conducive to successful and injury-free DIY activities.
The process of organizing a workbench for safer DIY is ongoing and needs regular review. As new tools or materials are acquired, or as safety standards evolve, adjustments must be made to maintain optimal conditions. Periodic reassessments of layout efficiency, safety equipment placement, lighting adequacy, and cleanliness should be scheduled. By staying proactive, users can adapt to changing project demands and mitigate new risks, ensuring that the workspace remains a safe haven rather than a hazard zone.
Teaching all individuals who use the workbench about the importance of organization and safety is equally important. Whether working alone or in collaboration, everyone must understand the layout system and the rationale behind storage choices and safety protocols. Good communication about what items belong where and how to handle tools properly cultivates respect for the workspace and reduces reckless behavior. Safety training or brief refresher sessions can reinforce these principles, making a safer DIY workbench not just a personal goal but a shared commitment.
Incorporating ergonomics into workbench organization further enhances safety and comfort. The design should take into account typical postures and motions to minimize strain or injury during prolonged use. Adjustable workbenches, stool height, footrests, and tool positioning all contribute to reducing fatigue and preventing musculoskeletal problems, which are common among frequent DIYers. Considering ergonomics also includes fostering a workflow where tools follow a logical sequence, allowing smooth transitions between tasks without unnecessary effort or awkward positioning.
Environmental considerations play a role as well. Organizing the workbench to encourage proper waste disposal, recycling of materials, and use of environmentally friendly products can create a safer, cleaner, and more sustainable workspace. Providing clearly marked bins for scrap wood, metal, and hazardous waste materials ensures safe and responsible handling. A tidy environment also means fewer tripping hazards and less fire risk from accumulated flammables, thus contributing directly to user safety.
Finally, a safer DIY workbench is a reflection of a proactive and mindful approach to craft and creation. It embodies respect for the tools and materials, loyalty to personal well-being, and dedication to quality work. While the initial effort in organizing and maintaining such a workspace might seem time-consuming, the dividends it pays in reduced injuries, increased productivity, and enhanced project satisfaction are invaluable. A well-organized bench turns any DIY undertaking into a more confident, efficient, and safer experience, allowing creativity and skill to flourish in the most secure environment possible.

by admin | Sep 27, 2026 | Home & Garden
Step stools are essential tools in many homes and workplaces, offering a practical solution for reaching high shelves, changing light bulbs, or performing detailed tasks that require a bit of extra height. While step stools appear simple and straightforward, their safety depends heavily on proper maintenance and regular stability checks. Neglecting these crucial steps can lead to falls, injuries, or damage to the stool itself. Understanding how to maintain and assess the stability of a step stool can prolong its lifespan and ensure user safety with every use.
Regular maintenance of a step stool begins with understanding the components that require the most attention. The joints and hinges are particularly vulnerable to wear and tear due to constant movement and pressure. Lubricating these parts occasionally helps to prevent squeaking and reduces the risk of the metal or plastic parts seizing up. Using a silicone spray or a light machine oil is typically effective for this purpose, but it is important to avoid over-lubrication, which can attract dirt and grime that may cause additional wear.
The surfaces of the step stool, especially the steps themselves, must be kept clean and secure. Over time, dirt, dust, and grease can build up, creating a slippery environment that increases the chance of accidents. Cleaning the steps with a mild detergent and water should be performed regularly, and any non-slip treads or padding should be inspected for wear. If the grips are damaged or missing, they should be replaced immediately to maintain the stool’s traction and ensure safe footing.
Another important aspect of step stool maintenance is inspecting the legs and feet. These components bear the full weight of the user and must provide a stable foundation. If the stool has rubber caps or foot pads, they should be intact and free from cracks or significant wear. Worn-out foot pads can cause instability, especially on smooth floors, and increase the likelihood of slipping. In addition, the legs themselves should be checked for bends, cracks, or any signs of fatigue that could compromise their structural integrity.
Instability in a step stool can sometimes be subtle and not immediately obvious. A thorough stability check includes placing the stool on a flat surface and giving it a gentle shake to identify any wobbling or rocking. If movement is detected, the stool should never be used until the source of instability is addressed. This might involve tightening screws and bolts, replacing worn-out components, or, in some cases, discarding the stool if repairs are not feasible. Using an unstable stool can have serious consequences, particularly in professional environments where the risk of injury can be amplified.
When performing maintenance, it is essential to follow the manufacturer’s guidelines, as materials and designs vary significantly between different models. Some stools feature adjustable legs, telescoping mechanisms, or folding designs that each require specific care practices. Ignoring these instructions can result in improper repairs or even void warranties. For example, some aluminum stools must not be exposed to certain cleaners or solvents that could degrade the metal or protective coatings. Additionally, understanding the weight capacity limits of a step stool and adhering to them without exception ensures that the stool’s stability is not compromised by excessive loads.
Beyond physical inspection and cleaning, storage practices play a crucial role in preserving the condition of a step stool. Keeping the stool in a dry, stable environment helps prevent rust and corrosion, particularly for metal models. Storing it in an area where it is not exposed to heavy impacts or continuous vibration can also minimize damage to movable parts like hinges and locks. For wooden stools, avoiding prolonged exposure to moisture or direct sunlight will prevent warping, cracking, and weakening of the material.
There are also safety considerations to keep in mind before each use. It is wise to check that all locking mechanisms are fully engaged and functioning properly. Many step stools have fold-out legs or braces that lock into place to enhance stability; if these locks fail, the risk of collapse increases dramatically. Verifying that the steps are level and that the stool is sitting flat on the ground further reduces the chance of tipping or falling, which is crucial on uneven floors or surfaces prone to vibration.
Training users on proper stool etiquette can also prevent accidents and maximize stability. This includes advising that users face the stool when climbing or descending, avoid sudden movements or reaching too far while on the stool, and keep the feet centered on the steps at all times. It is important to remind users not to stand on the top cap of the stool unless it is specifically designed as a step, as this can shift the center of gravity and induce tipping.
In addition to routine checks, periodic in-depth inspections by a professional or qualified maintenance team can identify issues that might be missed during daily use. For workplaces where step stools are used regularly, establishing a maintenance schedule and detailed checklist enhances safety culture and keeps equipment at peak performance. Such inspections might involve structural integrity assessments, replacement of worn parts, tightening of fasteners, and verification of weight ratings.
Safety signage or labeling on the stool can also aid in maintaining stability by reminding users of weight limits and proper use techniques. Some modern step stools come with integrated indicators or alarms that alert the user when the stool is improperly positioned or not fully locked. While these features may not be necessary for all users, they represent an advancement in designing safer equipment and reducing human error.
Environmental factors can also affect a step stool’s stability over time. For instance, exposure to extreme temperatures can cause materials to expand or contract, potentially loosening joints or deforming surfaces. Chemical exposure, such as cleaning agents or industrial solvents, can degrade plastics and coatings, leading to brittleness or discoloration that might signal structural compromise. Regular maintenance routines should take these variables into account, especially in industrial or commercial settings where such risks are more prevalent.
When unexpected damage is found, such as cracked steps, bent legs, or broken locking mechanisms, it is imperative to stop using the stool immediately. Continuing to use damaged equipment risks serious injury and further damage. Repair options may vary from professional refurbishment to part replacements or complete stool replacement. In some cases, DIY fixes may seem tempting but could undermine the stool’s engineered safety, so consulting the manufacturer or a professional repair service is advised.
In terms of choosing a new step stool or replacing an old one, selecting a design that emphasizes stability features helps minimize maintenance and safety concerns. Features such as wider steps, non-slip surface coatings, sturdy locking braces, and anti-slip foot pads contribute significantly to a safer user experience. Reviews and safety certifications should be considered to ensure the product meets relevant safety standards.
Properly maintaining a step stool goes beyond merely extending its life; it is fundamentally about preserving safety in everyday use. By regularly checking for stability, inspecting for damage, cleaning, lubricating moving parts, and storing the stool correctly, users can minimize risk and ensure the stool performs reliably when needed. Establishing a maintenance habit not only protects individuals but also supports a culture of safety in environments where these seemingly simple tools are frequently employed.
In conclusion, the regular upkeep of a step stool is a critical responsibility that should never be overlooked. Stability checks and maintenance routines provide reassurance that the stool can safely support its user without risk of accidents. By committing to these practices and addressing issues promptly, anyone can enjoy the convenience of a step stool while safeguarding against potential hazards. As a tool that enables greater reach and efficiency, the step stool deserves as much care and attention as any other piece of equipment to maintain its reliability and ensure the well-being of those who depend on it.

by admin | Sep 26, 2026 | Home & Garden
Ensuring safety when working at heights is paramount in any environment, whether it involves construction sites, maintenance work, or household tasks. A ladder is one of the most common tools used to reach elevated areas, but its potential hazards are often underestimated. Regular ladder safety inspections are critical in preventing accidents, injuries, and even fatalities. These inspections serve as a proactive measure to identify defects, weaknesses, or unsafe conditions before the ladder is put to use, thus safeguarding workers and users alike.
The first step in ladder safety inspections involves a thorough visual examination of the entire ladder. This means checking for any visible damage such as cracks, bends, corrosion, or deformities. Material integrity is essential; for example, aluminum ladders should be free from dents and corrosion, while wooden ladders must not have splinters, rot, or warping. Pay particular attention to the rungs and side rails, as wear or damage in these areas can compromise ladder stability. Ladder feet should also be inspected for excessive wear or missing anti-slip components, which are crucial for maintaining firm ground contact.
Beyond the visual check, functional testing is necessary to confirm that all moving parts are operational and secure. Extension ladders, in particular, must have locking mechanisms that engage properly to prevent sudden collapse or slippage. Hinges on step ladders should open fully and lock into place without difficulty. Additionally, the ladder’s weight rating, often indicated on a label or sticker, should be verified to ensure it aligns with the anticipated load during use. Overloading a ladder can lead to structural failure, and this information should never be ignored.
During inspections, cleanliness is another overlooked aspect. Dirt, grease, or other substances on rungs can lead to slips and falls, compromising user safety. Cleaning the ladder as part of the inspection process helps maintain adequate grip and traction. Alongside cleanliness, it is important to ensure that any labels or manufacturer instructions remain legible. These often include crucial safety guidelines and load limits, which inform proper usage and maintenance protocols.
Environmental factors also influence ladder safety and must be considered during inspections. Exposure to extreme temperatures, moisture, or chemicals can degrade ladder materials over time. For instance, metal ladders left outside without adequate protection can suffer from rust and corrosion, weakening their structure. Similarly, wooden ladders exposed to moisture may swell or rot, making them unsafe to use. Identifying signs of environmental damage during inspections allows for timely repairs or replacements and prevents the use of compromised equipment.
Sometimes the ladder inspection uncovers issues that are not immediately visible, requiring a more detailed assessment. For example, internal rust or corrosion within metal components might necessitate disassembly or the use of specialized tools like ultrasonic thickness gauges. Similarly, loose rivets, bolts, or welds can be hidden but significantly impact the ladder’s integrity. Regular maintenance practices such as tightening fasteners, lubricating hinges, and replacing worn parts should be part of the inspection routine to keep ladders in optimal condition.
Documentation plays a vital role in ladder safety inspections. Creating and maintaining detailed records of each inspection, including dates, findings, corrective actions, and personnel responsible, helps track the ladder’s condition over time. This documentation is important not only for internal safety management but also for compliance with occupational safety regulations. Many organizations and regulatory bodies require proof of routine inspections as part of workplace safety audits, underscoring the importance of consistent record-keeping.
In addition to scheduled inspections, conducting ladder safety checks before every use is a recommended best practice. This quick assessment helps identify any damage or instability that may have occurred since the last formal inspection. Workers should be trained to recognize common signs of ladder deterioration and encouraged to report any concerns immediately. Empowering users with knowledge and responsibility fosters a safety culture, reducing the likelihood of accidents caused by overlooked ladder defects.
Training is a fundamental element that complements ladder safety inspections. Users need to understand how to select the right ladder for the task, how to inspect the ladder properly, and how to position and climb it safely. Proper training also includes recognizing unsafe ladder conditions identified during inspections and knowing when to remove a ladder from service. Regular refresher training sessions can help reinforce these principles, ensuring safety remains a top priority at all times.
Certain industries demand even stricter adherence to ladder safety inspections due to the higher risk associated with their work environments. Construction, electrical maintenance, and industrial manufacturing often involve ladders being used in challenging conditions, increasing the chance of accidents. For these sectors, inspections may also incorporate additional elements, such as verifying ladder grounding to prevent electrical hazards or ensuring compatibility with personal protective equipment. Tailoring inspection protocols to the specific hazards of each industry further enhances the effectiveness of safety measures.
Technological advancements have introduced innovative tools to assist with ladder safety inspections. Mobile apps and digital checklists streamline the inspection process, making it easier to document findings and communicate necessary repairs rapidly. Some workplaces use QR codes on ladders that, when scanned, provide instant access to inspection history, manufacturer instructions, and safety guidelines. Thermal imaging and other non-destructive testing methods can detect hidden flaws in ladder components, promoting a higher degree of safety assurance. Incorporating technology into the inspection routine helps maintain thoroughness and efficiency.
Despite the importance of ladder safety inspections, they are sometimes neglected due to time constraints or complacency. Skipping inspections or conducting them superficially can have dire consequences. The Centers for Disease Control and Prevention (CDC) emphasizes that ladder-related injuries are preventable when safety protocols are consistently applied. Ensuring that inspections are prioritized as a vital element of workplace safety programs can save lives and reduce downtime caused by accidents.
Proper storage of ladders is another vital factor that impacts their safety and longevity. Storing a ladder in a dry, shaded, and secure area prevents unnecessary exposure to damaging elements and reduces the risk of unintentional damage from other equipment or environmental factors. The inspection process provides an opportunity to assess whether the current storage methods are adequate or if improvements are needed to further protect ladder integrity.
When defects or damage are identified through ladder safety inspections, immediate steps must be taken to remedy the situation. Minor issues like loose screws or surface corrosion can often be repaired, but significant damage such as bent or cracked rails generally necessitates retiring the ladder from service. It is crucial to clearly mark any ladder deemed unsafe to prevent accidental use. Implementing a strict policy for removing and replacing damaged ladders ensures that only safe equipment is available for use, minimizing potential hazards.
Involving employees in the ladder inspection process can enhance overall safety awareness. Encouraging a system where users report defects and participate in routine inspections can lead to earlier detection of issues. Peer involvement instills a collective responsibility for safety, reducing the likelihood of overlooked hazards and fostering a work environment where safety is everyone’s concern.
Finally, ladder safety inspections are not just an isolated task but part of a broader safety management strategy. Integrating ladder inspection protocols with other safety practices such as fall protection, hazard assessment, and emergency response planning creates a more comprehensive approach to minimizing risks at elevated work sites. Organizations should continuously review and update their inspection procedures to align with evolving safety standards and incorporate lessons learned from incident investigations.
In conclusion, consistent and thorough ladder safety inspections are crucial for preventing accidents and ensuring the wellbeing of anyone working at heights. By meticulously examining the ladder’s condition, functionality, and environmental impact, users can identify potential hazards before they cause harm. Coupled with proper training, record-keeping, and technological tools, these inspections form a robust safety framework that protects workers, enhances productivity, and promotes a culture of safety awareness. Prioritizing ladder safety inspections is an investment that yields invaluable returns in safeguarding lives and maintaining operational efficiency.
by admin | Sep 25, 2026 | Home & Garden
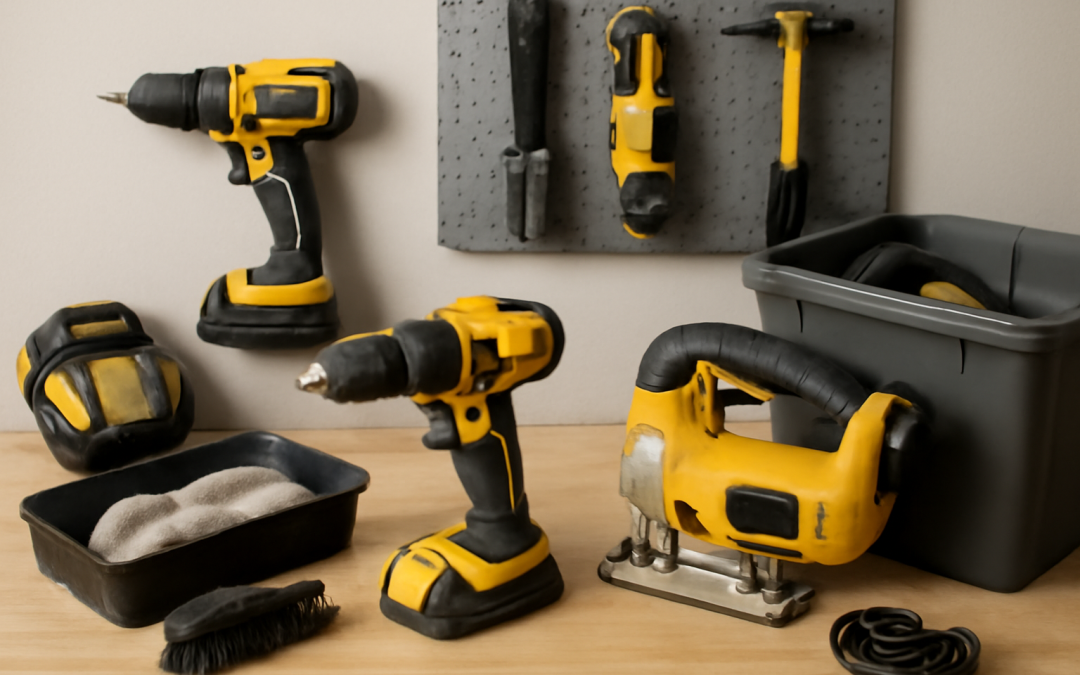
Maintaining power tools in optimal condition is essential for anyone who relies on them regularly, whether for professional work or home projects. Proper cleaning and storage not only extend the life of these tools but also enhance their performance and safety. Given that power tools often deal with dust, debris, moisture, and rough usage, neglecting care can lead to diminished efficiency, costly repairs, or the need for premature replacement. Therefore, understanding the best practices for power tool cleaning and storage is crucial for safeguarding investments and ensuring reliable operation day after day.
The first step in effective power tool care begins immediately after use. While many may be eager to put tools away and move on to the next task, wiping down surfaces and removing dust and residues right away prevents buildup that can interfere with moving parts and electrical components. Power tools like drills, saws, and grinders often accumulate fine dust or wood shavings, which can clog vents and damage motors if left unchecked. Using a soft brush, compressed air, or a dry cloth helps clear these contaminants before they embed themselves deeper into the tool’s mechanisms.
In addition to surface cleaning, paying attention to the tool’s specific components is essential. For example, corded tools require particular inspection of electrical cords and plugs for wear or damage, which might not be visible at a glance. Frayed or cracked cords are hazards that can lead to shocks or short circuits, and therefore should be repaired or replaced immediately. Battery-operated tools demand equal care, including checking battery terminals for corrosion or residue. Wiping contacts with a clean, dry cloth and ensuring batteries are stored separately in a cool, dry environment prevents oxidation and prolongs battery life.
Lubrication is another vital aspect of maintaining power tools. Many tools have moving parts that require periodic oiling or greasing according to the manufacturer’s instructions. Neglecting lubrication can lead to increased friction, overheating, and accelerated wear, reducing the tool’s lifespan. However, over-lubrication can draw in dirt and dust, so applying the right amount and type of lubricant is key to effective maintenance. Taking time to consult the user manual for each tool ensures appropriate care routines that align with manufacturer recommendations.
Cleaning power tools also involves addressing accumulations of grease, paint, or adhesive substances that may occur depending on the type of task. Tools used in environments with paint or glue should be cleaned with recommended solvents to avoid damage to plastic or metal parts. Avoid harsh chemicals that may corrode or discolor components; instead, use specialized cleaning agents designed for tool maintenance. Prompt attention after use keeps tools functioning smoothly and reduces the risk of sticky residues impairing precision or operation.
Proper storage conditions play a fundamental role in preserving power tools’ operational integrity. Environmental factors such as humidity, temperature fluctuations, and exposure to dust or chemicals can accelerate deterioration. Storing tools in a dry, climate-controlled space protects them from rust and electrical damage. Avoiding damp basements, unsealed garages, or areas prone to extreme temperatures helps maintain tool reliability and prevents the internal mechanisms from seizing or degrading prematurely.
Implementing organized storage systems not only protects power tools but also improves workflow efficiency. Tools stored with other related accessories or attachments allow for quick access during projects, reducing downtime. Installing wall-mounted racks, pegboards, or shelves specifically designed for power tools optimizes space and helps keep each tool in its designated place. Using original cases or hard plastic containers with custom foam inserts is especially beneficial for fragile or expensive tools, offering additional cushioning and protection from accidental knocks or drops.
Battery-powered tools require extra consideration in storage practices. Batteries should be removed when tools are stored for extended periods to prevent discharge or leakage. Storing batteries separately in a cool, dry environment away from direct sunlight safeguards their chemical integrity. Additionally, maintaining periodic charging of rechargeable batteries rather than allowing them to fully drain or remain idle for long stretches effectively prolongs their usable life. Avoiding extreme cold or heat is critical, as temperature extremes can damage battery cells.
Regular inspection routines integrated with cleaning and storage practices ensure that small issues are caught before they escalate into serious problems. Checking for loose screws, worn blades, or dust-blocked vents during routine maintenance minimizes the risk of tool failure during use. Scheduled maintenance intervals based on hours of use or time elapsed allow users to perform comprehensive cleaning, lubrication, and repairs systematically rather than waiting for tools to malfunction unexpectedly. Keeping a maintenance log can be a helpful strategy to track service dates and repairs.
In addition, safety considerations must be forefront when handling power tools during cleaning and storage. Always unplug corded tools before cleaning to prevent accidental startups. For cordless tools, remove batteries prior to cleaning or maintenance activities. Wearing protective gloves and goggles may be necessary when working with solvents or compressed air to avoid eye irritation or injury. Ensuring that tools are stored out of reach of children or unauthorized users also plays a critical role in preventing accidents, especially when tools are left unattended.
Adopting environmentally responsible habits benefits both tool care and broader sustainability efforts. Proper disposal of used cleaning materials, such as oily rags or spent solvent containers, prevents harmful substances from entering the environment. Rechargeable batteries require recycling facilities equipped to handle hazardous components. Avoiding the use of excessive chemicals and opting for biodegradable cleaning agents when possible minimizes environmental impact. Sustainable approaches to the upkeep and storage of power tools reinforce conscientious usage and longevity.
For professional tradespeople, investing in high-quality cleaning and storage solutions can significantly impact productivity and cost-efficiency. Quality tool bags with compartments, mobile tool chests with lockable drawers, and dust extraction systems integrated into storage areas help maintain a clean work environment and reduce downtime caused by dirty or malfunctioning equipment. Such investments may seem costly initially but reduce long-term expenses related to repairs and replacements. A well-maintained set of power tools often reflects professionalism and attention to detail, impressing clients and enhancing job site credibility.
On the other hand, even casual DIY enthusiasts can benefit from establishing disciplined cleaning and storage habits. Simple steps like wiping tools after each use, checking for debris-free vents, and storing tools in a designated cabinet or shelf dramatically improve the lifespan of home power tools. Tools that start easily, cut smoothly, and operate without overheating make projects more enjoyable and safer. Regular maintenance at home also supports quick troubleshooting and empowers users to address minor issues before escalating.
The role of manufacturer guidelines cannot be overstated in shaping effective cleaning and storage routines. Each power tool model has specific design elements and maintenance requirements. Adhering to these recommendations ensures that warranty protections remain valid and that tools operate as intended. Many manufacturers provide detailed manuals, online tutorials, or customer support resources to assist users in performing timely cleaning and storing practices. Taking advantage of these resources contributes to a longer useful life and safer operation.
Moreover, keeping the work environment organized and clean complements the care of power tools. Areas cluttered with dust, debris, or leftover materials increase the chances of tools becoming damaged or misplaced. Establishing habits like regular sweeping, vacuuming workspaces, and disposing of scraps promptly reduces environmental risks to tools. An organized workshop or garage simplifies cleaning processes by minimizing the surfaces and corners where dust accumulates, thereby reducing the frequency and intensity of tool cleaning required.
Understanding the signs that indicate a power tool requires more than routine cleaning and storage is critical. Unusual noises, vibrations, or resistance during operation point to internal wear or damage necessitating professional repair or part replacement. Overheating motor housings or intermittent power loss are also red flags. Responding promptly to these symptoms prevents further damage that can be caused by continued use under compromised conditions. Regular inspection when combined with proper cleaning and storage supports early diagnosis of mechanical or electrical faults.
In some cases, applying rust inhibitors or protective coatings on metal components may be warranted, especially if tools must be stored for a long time in less-than-ideal environments. Light films of oil or commercial rust-preventive sprays create a barrier against moisture that causes corrosion. However, these protective measures should be applied sparingly and wiped clean before the next use to avoid attracting dirt and debris. Such products are particularly useful for tools exposed to outdoor environments or high humidity areas.
Finally, considering the evolving technology within power tools is important for maintenance approaches. Modern tools often feature electronic controls, brushless motors, and integrated diagnostics. These advanced components may require specialized cleaning techniques and storage conditions compared to traditional tools. For example, sensitive circuit boards need protection from static discharge, and some manufacturers recommend using anti-static bags or climate-controlled storage solutions. Staying informed about these technological changes enhances the ability to care for tools properly in today’s market.
In summary, diligent cleaning and thoughtful storage practices provide the foundation for maximizing the performance, safety, and longevity of power tools. By incorporating routine maintenance, addressing specific component needs, and organizing storage environments, users can safeguard their investments and reduce costly downtime. Whether used professionally or for hobby projects, well-maintained power tools operate more efficiently, last longer, and contribute to satisfying and successful results. Prioritizing these care habits pays dividends that extend beyond the tools themselves, promoting safer and more productive working conditions for all.