
by admin | Oct 12, 2026 | Home & Garden
Ensuring safe and accessible walkways is essential for both residential and commercial properties. Uneven pathways, often caused by shifting soil, tree root intrusion, or natural wear and tear, can create trip hazards that pose significant risks to pedestrians. Regular walkway leveling and trip hazard checks are crucial preventive measures that help maintain a smooth, safe surface and reduce the likelihood of accidents. These inspections not only protect people from potential injuries but also help property owners avoid costly liability claims and expensive repairs down the line.
The foundation of effective walkway maintenance lies in understanding the common causes of uneven surfaces. Over time, environmental factors such as weather conditions, freezing and thawing cycles, and water drainage issues can cause the ground beneath walkways to settle unevenly. Tree roots may grow underneath, pushing up concrete slabs or paving stones, while erosion can wash away soil, leaving certain sections higher or lower than others. These subtle changes might seem minor at first but can quickly become dangerous tripping points, especially in heavily trafficked areas or locations frequented by children, the elderly, or individuals with mobility challenges.
Performing regular trip hazard checks is an essential step in preventing accidents. This process involves visually inspecting walkways for cracks, lifted edges, and uneven segments, as well as physically running a foot over the surface to detect irregularities that may not be immediately visible. Effective assessments should be systematic, covering all walkways on the property including entrances, exits, ramps, and driveways. In addition to visual inspections, the use of tools such as measuring gauges or levels can help quantify unevenness and determine whether repairs are necessary. This careful approach ensures no potential hazard goes unnoticed and allows for timely intervention.
Once trip hazards are identified, walkway leveling becomes the next priority. The approach to leveling varies depending on the materials used in the walkway and the severity of the unevenness. For concrete surfaces, options include mudjacking, where a thin grout mixture is pumped underneath the slabs to lift them back into place, or slab replacement if the damage is extensive. In brick or paver walkways, individual stones may be lifted and re-laid after leveling the foundation soil or base materials. The choice of method often depends on budget, extent of damage, and the desired longevity of the repair. Regardless of the technique, the ultimate goal is to create a flat, stable walking surface that blends seamlessly with the rest of the pathway.
Besides correcting existing hazards, a proactive maintenance plan can greatly reduce the appearance of future trip hazards. Proper drainage systems must be in place to prevent water from pooling and eroding the soil beneath walkways. Regular trimming of nearby trees and plant roots can prevent root intrusion that lifts pavement. It is also important to use appropriate materials and construction techniques during installation to ensure longevity and resistance to environmental shifts. Installing walkways with adequate joint spacing and proper bedding materials will allow for slight ground movements without causing severe cracking or displacement.
The benefits of investing in walkway leveling and trip hazard checks extend beyond safety and liability reduction. A well-maintained walkway enhances the aesthetic appeal of any property, contributing to positive impressions by visitors and potential buyers. It also ensures accessibility for everyone, including people with disabilities who rely on smooth surfaces for maneuvering mobility aids. Compliance with local regulations and accessibility standards, such as the Americans with Disabilities Act (ADA), often mandates regular inspections and prompt repairs, making trip hazard management not only a safety issue but also a legal responsibility.
Many property owners hesitate to address walkway issues promptly due to perceived nuisance or costs. However, delaying repairs typically leads to worsening conditions that require more extensive interventions. Small uneven patches can quickly grow into larger cracks or breaks, escalating the risk of accidents and dramatically increasing repair expenses. Early detection and correction are much more cost-effective and contribute to a longer lifespan for the walkway infrastructure. Furthermore, maintaining a safe environment demonstrates care and responsibility, fostering trust and goodwill among occupants and visitors alike.
Technology and innovation continue to improve the methods available for walkway inspections and repairs. Advanced laser scanning tools and drones can create precise surface maps that detect even minor deviations in walkway elevation. These high-tech methods enable property managers and contractors to develop accurate maintenance schedules and tailor repair strategies to specific problem areas. In repairs, newer materials such as polymer overlays and quick-setting concrete products reduce downtime and improve durability. Embracing these advancements can optimize safety and maintenance efficiency in ways that traditional methods alone cannot achieve.
Ultimately, the goal of walkway leveling and trip hazard checks is to create an environment where pedestrians can move with confidence and without fear of injury. This requires a harmonious balance between regular, detailed inspections, prompt repairs, and preventive maintenance practices. Property owners and facility managers should prioritize these efforts as part of an overall safety and upkeep plan, recognizing that the consequences of neglect can affect not just physical well-being but also financial stability and reputation.
In summary, the importance of maintaining level, hazard-free walkways cannot be overstated. Regular trip hazard checks enable early identification of potential dangers, while effective leveling repairs restore safety and accessibility. Proactive maintenance strategies mitigate the risk of future hazards and protect the investment in walkway infrastructure. By committing to these ongoing efforts, property owners create safer, more attractive environments that benefit everyone who uses them, reaffirming a commitment to public safety and responsible property management.

by admin | Oct 11, 2026 | Home & Garden
Cracks in a driveway are more than just an aesthetic issue; they can lead to serious damage over time if left unattended. Monitoring and addressing these cracks promptly is essential to maintaining the structural integrity and appearance of your driveway. Regular inspection allows homeowners to catch potential problems early, preventing costly repairs down the line. Understanding the causes of driveway cracks and the best methods for sealing them can extend the lifespan of your driveway significantly.
Driveways endure constant exposure to environmental factors such as temperature fluctuations, moisture, and heavy loads. Freeze-thaw cycles are particularly damaging, as water seeps into small fissures and expands when it freezes, widening cracks and causing new ones to form. Similarly, prolonged exposure to sunlight can cause materials like asphalt and concrete to deteriorate and become brittle, making cracking more likely. Additionally, the soil beneath a driveway might shift or erode, creating uneven surfaces that exacerbate cracking. driveway crack monitoring is vital to identify these issues before they lead to major damage.
Regular inspection of a driveway should be a routine task conducted ideally twice a year, such as in early spring and late fall. In some climates, more frequent checks may be warranted. Early detection involves looking for small hairline fractures, spalling, or uneven surfaces. Using tools such as a magnifying glass or even feeler gauges can help determine the depth and severity of a crack. This attention to detail helps determine whether a crack requires immediate attention or just continued monitoring.
When cracks are identified, understanding their cause is the next critical step. For instance, cracks caused by surface wear usually target the top layer and are relatively easy to repair. Deeper cracks, however, might indicate foundational problems, such as soil settling or poor initial construction. This knowledge directs the repair method chosen and impacts the long-term effectiveness of the seal.
Sealing cracks in your driveway is an effective way to inhibit the inevitable progression of damage. The sealing process involves filling the cracks to prevent water, dirt, and debris from penetrating the surface and exacerbating the problem. There are various products available, including asphalt-based crack fillers and polymer-modified sealants. Choosing the right sealant depends on the driveway material, crack size, and local environmental conditions.
Before sealing, the crack needs to be prepared appropriately to ensure the best adhesion of the sealant. This preparation usually includes cleaning out debris and vegetation that may have accumulated in the fissure. A wire brush, air compressor, or pressure washer can be used to ensure the crack is thoroughly cleared. In some cases, larger cracks may require routing, which involves widening and shaping the crack to create a uniform reservoir for the sealant.
Once the surface is clean and dry, the sealant can be applied. For narrow cracks, a liquid filler may be poured directly into the fissure, while wider ones might need a more viscous product or even backer rods to fill the gap adequately before sealing. After application, the sealant should be allowed to cure completely, which can vary from a few hours to several days depending on the product and weather conditions. Avoiding traffic on the repaired area until curing is complete is crucial to ensure durability.
Beyond individual crack sealing, comprehensive driveway maintenance involves the application of sealcoats. These coatings protect the entire surface from oxidation, water infiltration, and minor abrasions. Sealcoating acts as a barrier that further helps prevent cracks from forming while also restoring the driveway’s appearance. It’s advisable to perform sealcoating every two to three years for optimal protection, especially for asphalt driveways.
Neglecting crack monitoring and sealing can lead to cascading damage, including potholes, crumbling edges, and uneven surfaces that pose safety hazards. Water infiltration through cracks can erode the sub-base, causing significant structural damage that affects the longevity of the driveway. Moreover, untreated cracks diminish curb appeal and property value, as they suggest poor maintenance and potential hidden issues.
When damage extends beyond manageable cracks, partial or full driveway replacement may be warranted. This is a far more expensive and time-consuming solution compared to proactive monitoring and sealing. Taking the time and effort to assess and repair cracks early is a practical and financially sound strategy. Homeowners are encouraged to incorporate driveway inspections into their regular home maintenance schedules to avoid expensive surprises.
In climates with extreme weather patterns, the importance of driveway crack monitoring and sealing is even greater. Freeze-thaw cycles in colder regions accelerate crack formation, while high temperatures in arid regions can cause material degradation. In both scenarios, protective measures such as proper sealing not only prevent damage but also minimize repair costs. Adaptation to local weather patterns is a smart approach to drive long-term driveway durability.
Professional assessments can complement a homeowner’s own monitoring efforts, especially when cracks seem extensive or unusual. Experts can provide insights into the best repair materials and methods, and identify underlying issues such as poor drainage or structural deficiencies. Hiring a professional might seem costly initially but can prevent future large-scale repairs and ensure safety.
DIY crack sealing is an accessible option for many homeowners with minor cracks and a need for quick fixes. It requires minimal tools and can be done over a weekend with proper preparation and product choice. However, knowing when to engage a professional is crucial. Major cracks, complex structural problems, or extensive damage are best handled by experienced contractors to guarantee a safe and lasting repair.
Beyond sealing and monitoring, preventative actions can further reduce crack formation. For example, controlling vehicle load and avoiding heavy trucks on older or weaker driveways minimizes stress-related cracking. Proper drainage around the driveway helps prevent water pooling, which accelerates surface and sub-base deterioration. Landscaping that directs water away and keeping the driveway clean from oil, chemicals, and debris also contribute to its longevity.
In conclusion, proactive monitoring and sealing of driveway cracks are essential steps in preserving both the functionality and visual appeal of residential driveways. Early detection of cracks allows for timely repairs before minor issues evolve into costly damages. Proper surface preparation, the use of adequate sealing products, and adherence to recommended application techniques maximize the effectiveness of crack repairs. Combined with routine maintenance such as sealcoating and preventive measures, these efforts ensure that a driveway remains reliable and attractive for many years. The investment in careful crack monitoring and sealing ultimately pays off by enhancing safety, saving money, and maintaining the overall value of the property.
by admin | Oct 10, 2026 | Home & Garden
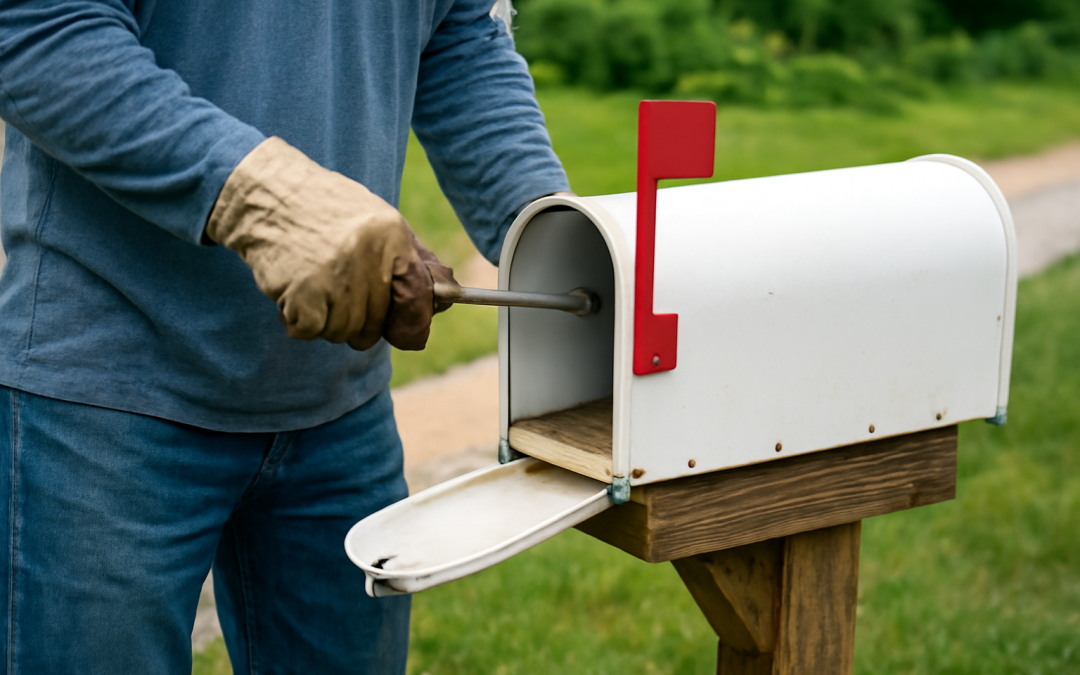
Whether you live in a busy urban neighborhood or a quiet rural area, the mailbox plays a crucial role in the daily routine. It serves as the primary point of contact for receiving letters, packages, bills, and other important correspondence. However, it is all too easy to overlook the care a mailbox needs to remain functional and secure. Regular attention to mailbox and post maintenance ensures that your mail is protected from damage and theft, prolongs the lifespan of the structure, and maintains the aesthetic appeal of your property.
Proper maintenance begins with understanding the various types of mailboxes and posts available. Traditional mailboxes are typically made from metal, plastic, or wood, each with its unique set of characteristics and maintenance requirements. Metal mailboxes, for instance, are durable but prone to rust if not properly cared for. Wooden mailboxes, although aesthetically pleasing, can suffer from rot, insect damage, and warping if exposed to the elements without adequate protection. Plastic mailboxes are generally low-maintenance but may crack or fade with prolonged sun exposure.
The post supporting the mailbox is just as important as the box itself. A sturdy post keeps the mailbox upright and securely in place, preventing damage from wind, accidental impacts, or heavy snow accumulation. Posts are commonly made from wood, metal, or composite materials, and each demands specific upkeep. Wooden posts, while traditional and attractive, need to be treated or painted to resist moisture and insect damage. Metal posts require inspection for rust or corrosion, and composite posts should be checked for structural integrity over time.
One of the most common problems affecting mailboxes and posts is weather-related wear. Exposure to rain, snow, and UV rays gradually deteriorates both the mailbox and its supporting structure. To combat this, routine inspections should be conducted, especially after harsh weather events. Look for signs of rust, chipped paint, cracks, or loose hardware. Addressing these issues early prevents minor damage from escalating into costly repairs or replacements.
Cleaning the mailbox is an essential but often neglected task. Dirt, bird droppings, spider webs, and leaves can accumulate inside and outside the mailbox. This not only detracts from the mailbox’s appearance but may also impede the smooth delivery of mail or damage its contents. Using mild soap and water to clean the mailbox and post, followed by thorough drying, helps maintain its appearance and hygiene. Avoid abrasive cleaners or tools that may scratch or damage the surface.
Paint is an effective way to protect and refresh a mailbox and post, but careful preparation is key. For metal mailboxes, sanding down any rust and applying rust-inhibiting primer before painting will extend their life. Wooden posts benefit from a fresh coat of exterior-grade paint or stain every few years to protect against moisture and UV damage. Choosing weather-resistant, high-quality paint designed for outdoor use ensures better durability and color retention.
Apart from general upkeep, security is a vital consideration in mailbox and post maintenance. Mail theft remains a significant concern, especially in certain neighborhoods. Installing a lockable mailbox or one with reinforced construction can deter criminals and safeguard your mail. Additionally, positioning the mailbox in a location visible from your home or street, along with adequate lighting, can reduce the risk of mail theft. If your mailbox does not offer lockable options, consider an adjacent secure compartment or mailbox with a secure drop slot.
The exact placement and height of the mailbox also influence its durability and accessibility. Postal regulations generally specify the height at which the mailbox should be installed and how far it should extend from the curb. Proper positioning allows postal workers to deliver mail without leaving their vehicles while reducing the chance of damage from passing cars or lawn maintenance equipment. Over time, soil erosion or ground shifting can cause the post to lean or tilt, so it’s important to check and realign the post as needed.
Winter months often bring additional challenges for mailbox and post maintenance. Snow accumulation and icy conditions can obscure the mailbox, making it difficult for mail carriers to locate and access. Heavy snowfall or plowing activities can also physically damage the post or mailbox if they are too close to the road edge. During colder months, clear snow away from the mailbox area regularly and consider installing protective guards or barriers to shield the mailbox from snowplows and snow blowers.
Repairs play a critical role in maintenance and should never be deferred. If the door hinges are loose or broken, if a post shows signs of splitting or rotting, or if the mailbox has dents or holes, prompt repairs will restore functionality and prevent further deterioration. For wooden posts showing rot, it may be necessary to replace the post entirely rather than patching, which is only a temporary fix. Metal mailboxes with severe rust should similarly be swapped out to prevent mail from falling through damaged areas.
In some cases, upgrading the mailbox and post may be the best option. New models often feature enhanced materials, better weather resistance, or improved security features. Modern mailboxes come in various designs and colors, allowing homeowners to select options that better match their home’s exterior or personal style. When installing a new mailbox, ensure it complies with local postal regulations and is positioned for both convenience and safety.
For those living in more rural or remote locations, mailbox and post maintenance takes on additional significance. Mail carriers may cover great distances and may not stop immediately if the mailbox is difficult to access or damaged. A mailbox in poor condition in these areas could result in missed deliveries or returned mail. In rural areas where wildlife or livestock might encounter the mailbox, sturdier posts and protective enclosures may be necessary to prevent damage.
Continuity in mailbox care also links to the overall curb appeal of a home. A well-maintained mailbox and post enhance the neatness and presentation of the residence, contributing positively to neighborhood aesthetics and potentially increasing property value. Overgrown vegetation around the mailbox can obstruct postal workers’ access, so trimming shrubs or grass regularly is also an aspect of maintenance.
Seasonal inspections are highly recommended to catch emerging issues and plan for any necessary care. Spring is an ideal time to examine damage from winter weather and carry out repainting or sealing. Summer heat and intense sun may require monitoring for fading or warping. Autumn provides an opportunity to clear away fallen leaves and make adjustments before the cold months arrive. Observing and documenting the condition of your mailbox periodically helps establish a maintenance schedule suited to your specific situation.
Finally, any repairs or installations should be done using quality tools and materials. Utilizing galvanized screws, stainless steel hardware, and weather-resistant coatings will enhance the longevity of your mailbox and post. Improper or rushed maintenance often results in recurring problems or more significant expenses down the line. If unsure about certain repair tasks, consulting a professional or your local postal service can offer guidance. Postal services sometimes provide recommendations or specifications about mailbox maintenance to ensure the smooth delivery of mail.
Taking the time to maintain your mailbox and post might seem minor compared to other home upkeep tasks, yet its importance cannot be overstated. Proper care prevents damage, enhances security, meets postal requirements, and ensures that each piece of mail arrives safely and on time. Whether cleaning, painting, repairing, or replacing parts, consistent attention keeps your mailbox in top condition and protects a vital link to communication, commerce, and daily life.
by admin | Oct 9, 2026 | Home & Garden
Maintaining the moving parts of a gate is essential not only for functional purposes but also for safety and aesthetic appeal. Over time, due to exposure to weather conditions, frequent use, and general wear and tear, gate hinges and latches can become stiff, rusty, or misaligned. Addressing these issues through regular maintenance ensures smooth operation and prolongs the life of the gate. This process requires some attention to detail, appropriate tools, and an understanding of the mechanisms involved.
The gate hinge, an integral component that allows the gate to swing open and closed, requires special attention. It bears the majority of the gate’s weight and experiences constant movement, which subjects it to stress and friction. When hinges are neglected, they may start to squeak, bind, or become loose, impairing the gate’s proper function. The first step in maintaining hinges is inspecting them for signs of wear, such as rust or bending. Rust can degrade metal hinges significantly, especially if the gate is situated outdoors in humid or rainy climates.
Cleaning the hinges regularly is a vital practice. Dirt, debris, and accumulated grease can cause the hinges to stick or make the movement uneven. Using a wire brush or an old toothbrush to remove visible grime, followed by wiping the hinges with a cloth dampened with a mild detergent, can restore some of the smoothness in the hinge mechanism. For particularly stubborn rust, applying a rust remover or a mixture of vinegar and baking soda can be effective. However, care should be taken not to damage any protective coatings.
Lubrication is another critical aspect. After cleaning, hinges must be lubricated with appropriate lubricants like silicone spray, penetrating oil, or lithium grease. These products reduce friction and help prevent rust. Applying lubricant to the pivot points of the hinge ensures the gate swings quietly and effortlessly. It is advisable to avoid heavy greases as they attract dirt and dust, which can further exacerbate wear. Depending on usage patterns and environmental exposure, lubrication might need to be reapplied every few months.
In some cases, hinges may become loose or misaligned. This could happen if screws or bolts have worked themselves loose over time or if the post supporting the gate has shifted. Tightening all fasteners is an essential step in gate hinge maintenance. For wooden gates, replacing worn-out screws with longer or wider ones can provide better grip. In metal gates, using washers or lock nuts can prevent fasteners from loosening. If the gate sags or does not align properly, adjusting the hinges may be necessary. This can be done by loosening the hinge screws slightly, repositioning the gate, and retightening the screws to hold the new position.
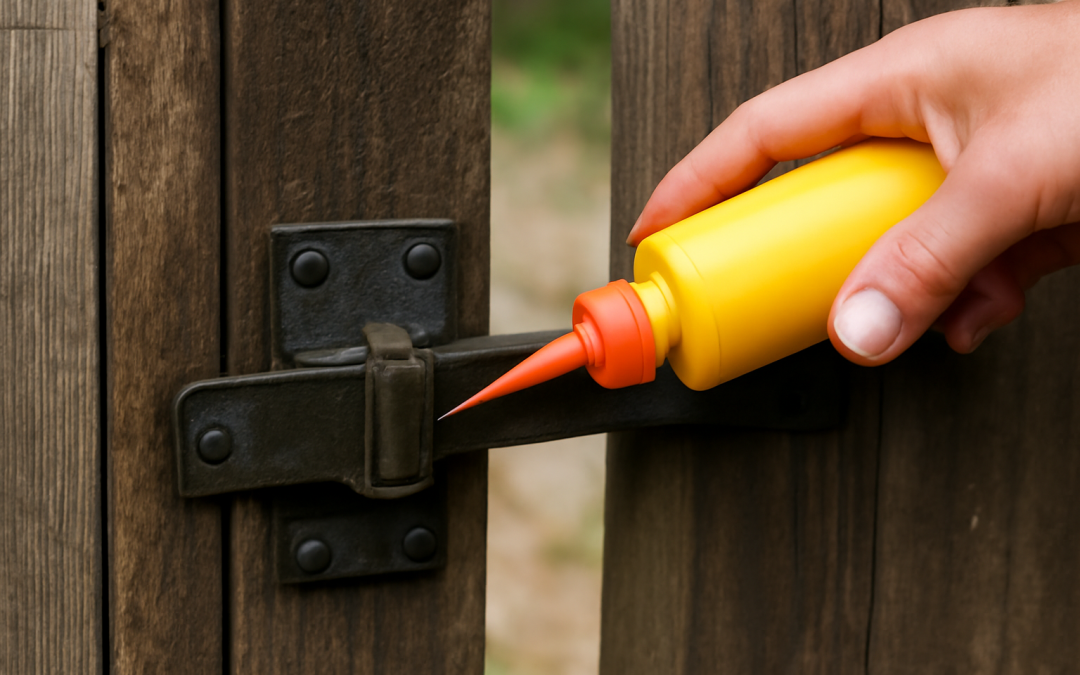
Apart from hinges, latches are equally important in gate maintenance. A latch ensures that the gate stays closed securely and prevents accidental openings. Latches vary in complexity from simple hook-and-eye types to more intricate locking mechanisms. Whatever the design, maintaining the latch starts with a thorough inspection. Check for rust, broken parts, or misalignment that could make the latch difficult to use.
Cleaning latches involves removing accumulated dirt and rust, just as with hinges. For metal latches, a light sanding with fine-grit sandpaper can remove surface rust and smooth rough edges. After cleaning, a suitable lubricant should be applied to all moving parts to facilitate ease of use. It’s also important to ensure the latch closes firmly and securely. If the latch is loose or wobbly, retightening the screws or bolts that hold the latch together often solves the issue.
Sometimes, the latch may not align properly with the catch or strike plate, causing difficulty in securing the gate. This misalignment can stem from shifting posts, warping of wooden gates, or damage caused by impacts. Adjusting the position of the catch plate, or in some cases altering the latch itself, can resolve these issues. For example, repositioning the strike plate by loosening the screws slightly and moving it into better alignment can make the latch automatically close and lock as intended.
Periodic replacement of worn parts is also a key consideration. Hinges and latches that have become too rusted or damaged beyond repair should be replaced with new ones. Modern replacements come in various materials such as stainless steel or galvanized steel, which offer better resistance to corrosion. Selecting quality parts not only improves the lifespan of the gate hardware but also the overall security and smooth operation.
Besides routine cleaning and lubrication, protecting the hardware from the elements can significantly extend its life. Applying protective coatings such as rust-resistant paint or sealants on metal parts can shield them from moisture and oxidation. For wooden gates, weatherproofing the wood with stains or varnishes helps prevent warping, which indirectly affects the alignment and function of hinges and latches.
Environmental factors should also be considered in the maintenance plan. For example, gates exposed to salty sea air require more frequent attention to prevent accelerated corrosion. Likewise, gates in dusty rural areas might need more cleaning to remove dirt build-up. Seasonal maintenance schedules can be developed to address the varying conditions through the year. For instance, a thorough inspection and lubrication after winter will help clear any accumulated salt or grime and prepare the gate for frequent use in warmer months.
Knowing when to seek professional help is important. If hinges or latches are severely damaged or if the gate itself is leaning or has structural issues, consulting a professional is advisable. Professionals can assess whether the gate frame needs reinforcement or if specialized hardware installation is required. They also have the tools and expertise to perform alignments or replacements that might be challenging for an average homeowner.
Another essential maintenance step is monitoring the gate’s overall frame and support structure. An unstable or rotten post can cause the hinges to misalign and place undue stress on the latch. Ensuring the posts are firmly set in concrete and checking for cracks or signs of rot can prevent hardware issues. Repairs to the frame should take priority to maintain gate function and safety.
Regular use also plays a role in maintenance. Gates that are opened and closed frequently need more upkeep than those rarely used. Conversely, gates that remain closed for extended periods can seize up if hinges and latches are neglected. Periodic operation of the gate, accompanied by visual and tactile inspections, helps identify potential problems early before they escalate into costly repairs.
In summary, consistent maintenance of gate hinges and latches involves inspection, cleaning, lubrication, adjustment, and timely replacement of worn components. Protecting gate hardware against environmental damage and addressing structural integrity ensures safe and efficient gate operation. By adopting a proactive approach, gate owners can enjoy a smoothly functioning entranceway that enhances both security and curb appeal for years to come.
by admin | Oct 8, 2026 | Home & Garden
Maintaining a fence is an essential task for any property owner who values aesthetics, privacy, and security. Whether the fence is made of wood, vinyl, or metal, proper upkeep not only extends its lifespan but also enhances the overall appearance of the outdoor space. Each material comes with its own set of challenges and maintenance requirements that, when followed diligently, ensure the fence remains sturdy and visually appealing. Understanding these differences is crucial to keeping a fence in top condition year after year.
Wood fences are cherished for their natural beauty and versatility, but they demand consistent attention to prevent weather-related damage. Wood is prone to issues such as warping, rotting, and insect infestation, especially in regions with high humidity or extreme weather changes. One of the most critical steps in maintaining a wood fence is regular inspection for cracks, loose nails, or splintering wood, which can be early signs of deterioration. Addressing these problems promptly can prevent more extensive damage and preserve the fence’s structural integrity.
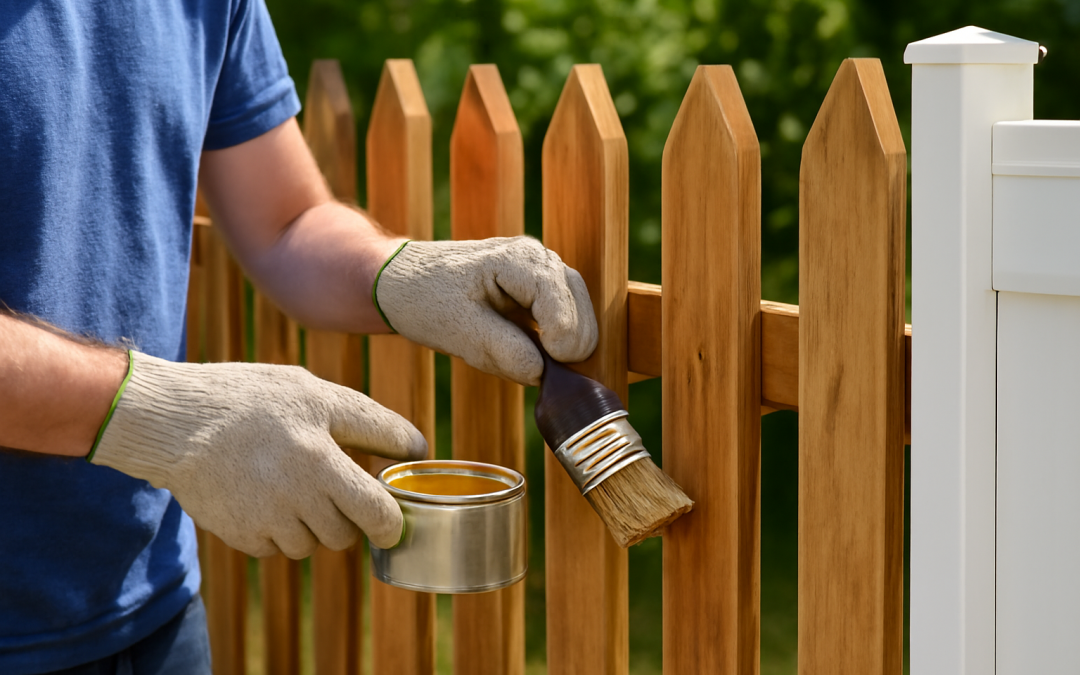
Cleaning a wooden fence involves removing dirt, mildew, and algae that accumulate over time. Using a soft brush combined with a mixture of water and mild detergent is often effective for routine cleaning, while occasionally pressure washing may be necessary to restore the fence’s original appearance. However, care should be taken with pressure washing to avoid damaging the wood fibers. After cleaning, applying a weather-resistant sealant or stain provides a protective barrier against moisture and ultraviolet rays, which are primary culprits in wood degradation.
Regular sealing or staining every two to three years is recommended to keep the wood protected and vibrant. These treatments help to repel water and block UV radiation, which causes the wood to fade and crack. Choosing the right product depends on the wood type and the desired finish, with oil-based stains typically penetrating deeper but requiring more frequent reapplication compared to water-based options. Additionally, reattaching any loose panels or rails ensures the fence remains sturdy and safe.
Vinyl fences have gained popularity because of their durability and low-maintenance nature, making them a suitable choice for those who want a fence that requires less ongoing effort. Vinyl resists rot, insect damage, and weathering, but it is not completely maintenance-free. Dirt and grime can dull its finish, and over time, the vinyl can develop surface scratches. Regularly washing the fence with soap and water helps to maintain its pristine appearance. Using a soft cloth or sponge prevents scratching the surface and preserves the fence’s glossy look.
For tougher stains or mildew, a mild bleach solution can be applied, followed by a thorough rinse to avoid chemical buildup. It is important to avoid harsh solvents or abrasive cleaners, as these can cause discoloration or damage to the vinyl material. Occasionally inspecting the fence for cracks or broken panels is also advisable since vinyl can become brittle in extremely cold weather or suffer impact damage from heavy objects. Repairing or replacing damaged sections promptly will retain the fence’s functional and aesthetic value.
Unlike wood, vinyl doesn’t require repainting or sealing, which simplifies its upkeep significantly. However, keeping vegetation trimmed around the base of the fence prevents mold and algae growth that thrive in damp conditions. Additionally, checking the alignment regularly ensures that the fence posts remain secure and the panels straight, maintaining the structural soundness of the fence line.
Metal fences offer a blend of strength and modern appeal, available in materials such as wrought iron, aluminum, and steel. These fences are generally more resilient to environmental damage but can face issues like rust, corrosion, and fading paint. Preventive maintenance is particularly important for metal fences to stop the formation of rust, which can weaken the metal and compromise the fence’s durability. Frequent inspection for signs of rust or chipped paint is essential, and areas of concern should be cleaned and treated immediately.
Cleaning metal fences is straightforward, typically involving a rinse with water followed by scrubbing with mild soap and a soft brush. For stubborn rust spots, using a wire brush or sandpaper helps to remove corrosion before applying a rust-inhibitive primer and fresh paint. Painting a metal fence not only refreshes its appearance but also adds a protective coating against moisture and UV damage. It is best done every few years or as soon as any paint deficiencies become apparent.
In salty or coastal environments, where metal fences are more prone to corrosion, additional protective treatments such as clear sealers or specialized paints can offer extended protection. Fixing loose or bent panels, tightening screws, and lubricating moving parts on gates ensure that the fence remains functional and pleasing to the eye. Unlike wood or vinyl, metal fences may require professional attention for welding or structural repairs due to the heavier and more complex construction.
Seasonal changes play a significant role in determining the maintenance frequency of any fence material. Harsh winters, heavy rains, intense sunlight, and fluctuating temperatures can accelerate wear and tear. Winterizing a fence may involve removing snow buildup from wood or metal fences to prevent moisture damage, while in the summer, protecting surfaces against UV exposure is a priority. Preparing fences for these seasonal impacts includes clearing debris, tightening loose components, and applying protective treatments appropriate to the material type.
Another aspect of fence maintenance involves landscaping considerations. Keeping plants, vines, and tree branches away from the fence prevents moisture retention and physical damage. Dense vegetation can trap humidity against the fence’s surface, leading to rot in wood or promoting rust in metal. Proper clearance also allows for easier access during cleaning and repairs, ensuring that the maintenance process is as effective as possible.
Pest control is particularly important for wooden fences. Insects such as termites and carpenter ants can cause serious damage if left unchecked. Applying insect-resistant treatments or barrier sprays early in the fence’s lifespan can deter these pests. Additionally, removing any nests or infestations promptly prevents further structural weakening. Metal and vinyl fences typically have less concern with pests, though it is still wise to monitor for any signs of hidden damage caused by animals in the vicinity.
Installing a fence also impacts maintenance expectations. Proper initial installation, including the use of quality materials, secure posts, and appropriate foundation methods, sets the stage for easier upkeep. A well-installed fence resists leaning, shifting, and warping, which reduces the need for frequent repairs. For example, in wooden fences, using rot-resistant wood types such as cedar or pressure-treated pine can lower the likelihood of decay and insect activity.
Adequate drainage around the fence posts is equally important to avoid standing water that accelerates deterioration. Many fences suffer from moisture-related problems when posts are buried directly into soil without proper drainage or gravel bases. Ensuring water runoff does not pool near fence lines reduces risks for all materials, as excess moisture is a common enemy to fence longevity.
Safety should never be overlooked during fence maintenance tasks. When cleaning or painting, wearing protective gear such as gloves and goggles minimizes exposure to chemicals and debris. Using ladders or power equipment must be done with care, in line with recommended safety practices, to prevent accidents. Proper handling of sharp tools and careful disposal of old paint or chemical solvents also contribute to a safe maintenance routine.
Regular maintenance has the added benefit of boosting the property’s curb appeal and value. A well-maintained fence instantly enhances the visual impression of a home or business, creating a neat and welcoming boundary. Neglect, by contrast, signals carelessness and can detract from the attractiveness of landscaping and outdoor design. Investing time and effort into routine fence care ensures a visually cohesive and inviting environment that reflects pride in property ownership.
In terms of cost-effectiveness, staying on top of fence maintenance helps avoid costly repairs or premature replacement. Addressing minor issues early prevents them from becoming serious problems that require professional restoration or complete fencing replacement. Budgeting for seasonal upkeep and periodic treatments spreads out the expense over time, making it more manageable and preserving the investment in the fence.
Environmentally, proper maintenance of fences also supports sustainability efforts. Longer-lasting fences mean fewer resources consumed for replacement materials and less waste sent to landfills. Choosing eco-friendly stains, paints, and cleaning solutions further reduces environmental impact. Moreover, maintaining the structural integrity of fences protects boundary vegetation and landscaped areas, promoting healthier outdoor ecosystems.
In essence, the key to successful fence maintenance lies in understanding the unique needs of the material used and committing to a consistent care routine. Wood requires protection against moisture, insects, and sun exposure; vinyl benefits from gentle cleaning and inspection; metal demands rust prevention, painting, and occasional repair. Careful attention year-round, coupled with proactive seasonal preparations, ensures that fences remain beautiful and functional for many years.
This approach not only safeguards an important aspect of property infrastructure but also supports the enjoyment of outdoor living spaces. With the right maintenance strategies, wood, vinyl, and metal fences can continue to provide privacy, security, and charm, standing as durable boundaries that add value and character to any home or establishment. Adopting regular care routines and addressing problems promptly transforms fence maintenance from a chore into a manageable and rewarding practice.
by admin | Oct 7, 2026 | Home & Garden
Ensuring outdoor and indoor spaces are well-lit and secure often relies on the effectiveness of motion sensor lights. These devices detect movement and automatically turn on, offering convenience, saving energy, and enhancing safety. However, a critical factor that often goes overlooked by homeowners and facility managers alike is the proper calibration of these sensors. Without accurate adjustment, motion sensor lights can become more of a nuisance than a benefit, either failing to activate when needed or turning on unnecessarily. This is where the precise art of motion sensor light calibration plays a vital role.
Motion sensor lights operate by detecting infrared radiation that emanates from warm objects, typically humans or animals, within their field of view. When a detectable motion event occurs, the sensor triggers the light to illuminate for a predetermined amount of time. Calibration involves fine-tuning several parameters including sensitivity, detection range, and timing duration, which together control the sensor’s responsiveness and operational accuracy. An ideal calibration ensures that the motion sensor light activates exactly when intended and remains off during irrelevant movements or environmental noise.
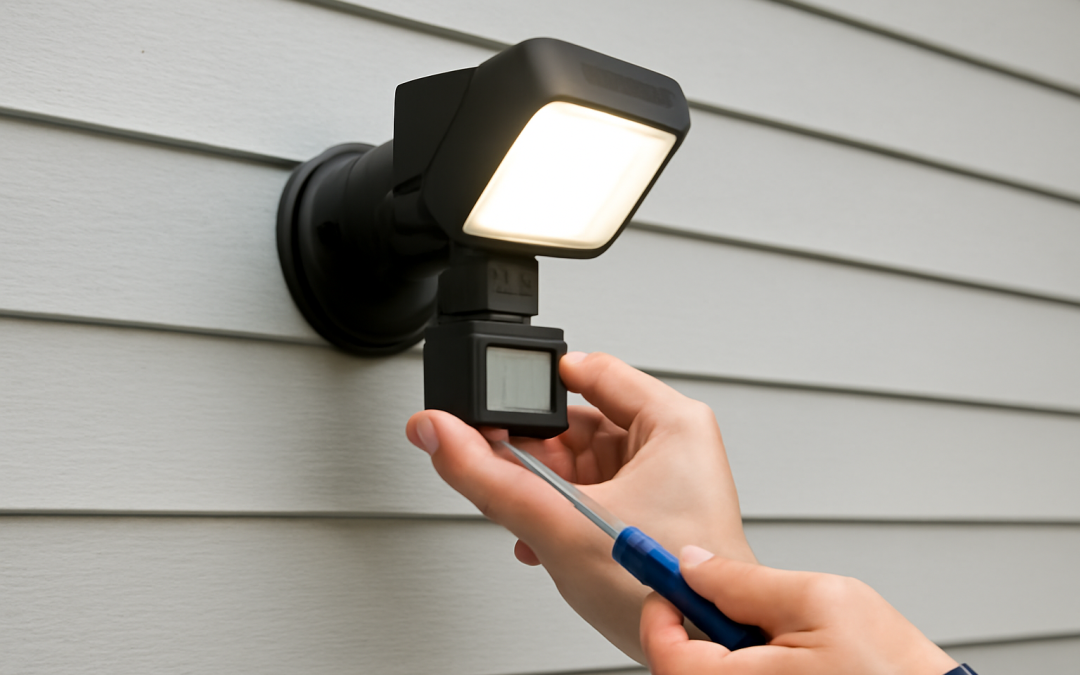
One of the first aspects to consider during calibration is sensitivity adjustment. Sensitivity dictates how reactive the sensor is to movement within its detection zone. If set too high, the motion sensor light may activate continually with minor or distant movements, such as leaves rustling, shadows passing, or small animals crossing the field. This not only wastes energy but can cause unnecessary wear and tear on the lighting mechanism. On the other hand, if the sensitivity is set too low, the sensor might fail to detect legitimate movement, rendering the device ineffective in its security or convenience roles. Achieving the right balance requires testing the sensor at different sensitivity levels, observing its behavior in various environmental conditions, and adjusting accordingly.
The orientation and physical installation location of the sensor significantly influence the effectiveness of the calibration process. Since motion sensors typically have a fixed detection angle and range, positioning the device in an area with optimal coverage ensures maximum functionality. For outdoor installations, this means placing the sensor where it can monitor common entryways, pathways, or driveways without obstructions such as trees or walls that block the signal. Indoors, sensors should be positioned to capture activity without being triggered by pets or HVAC airflow. Calibration in this phase includes verifying the sensor’s field of view and making orientation adjustments to restrict or extend the detection zone as needed.
Another crucial calibration step involves setting the correct time delay, which is the length of time the light remains illuminated after activation. If this delay is too short, the light may turn off prematurely, leaving an area in darkness while someone is still present. This can be particularly problematic in security applications or in spaces where continuous illumination is important for safety. Conversely, excessively long delays may lead to unnecessary energy consumption and faster depletion of lighting resources, especially if the light stays on long after movement has ceased. The ideal time delay balances energy conservation and utility so that the light stays on long enough to cover the presence of occupants but turns off soon after activity stops.
Operating voltage and light sensitivity calibration also play a role in refining sensor behavior. Some motion sensor lights feature adjustable thresholds that determine when the light activates concerning ambient light levels. For example, the light should ideally activate only during low-light or nighttime conditions to avoid wasting energy in daylight. Calibrating this threshold involves testing the sensor under different lighting environments and setting the parameters so the light triggers only when ambient lighting falls below a certain level. This prevents the light from activating unnecessarily during the day while ensuring optimal performance in darkness.
Environmental factors must not be ignored during the calibration process. Weather conditions such as rain, fog, wind, or extreme temperatures can impact sensor accuracy. For instance, heavy rain or fog may reduce the sensor’s detection ability by interfering with infrared signals, while strong winds might cause movement of foliage that leads to false activations. Calibration should include a period of observation across different weather conditions to fine-tune settings and ensure reliable performance year-round. In some cases, additional protective measures or sensor housings can be employed to mitigate environmental interference.
Maintaining the cleanliness and integrity of the sensor lens is another critical element in the calibration and overall performance of motion sensor lights. Dust, dirt, spider webs, or even excess moisture can impair the sensor’s ability to detect motion accurately. During calibration and routine maintenance, cleaning the lens and inspecting it for damage should be standard practice. Regular upkeep prevents false negatives or positives that could result from a compromised sensor surface and ensures the sensor operates at its designated sensitivity and range parameters.
Calibration also requires careful consideration of potential sources of false alarms. Motion sensor lights can sometimes be triggered by pets, vehicles, or shadows caused by passing clouds. To minimize these false triggers, the sensor sensitivity and detection zones should be adjusted appropriately. Some advanced sensors allow for multi-zone detection programming, enabling users to mask certain areas or customize specific response patterns. This level of fine-tuning helps tailor the sensor’s performance to the unique characteristics of the installation site, greatly reducing unwarranted activations.
Understanding the technical specifications and functionalities of different motion sensor technologies can assist in more effective calibration. Passive Infrared (PIR) sensors, microwave sensors, ultrasonic sensors, and dual-technology models all operate differently and thus require unique calibration approaches. PIR sensors detect heat changes and are most common, but they are susceptible to interference from heat sources and reflected signals. Microwave sensors emit microwaves and detect changes in the reflected waves caused by movement, generally allowing for longer range but are prone to interference by metal objects. Ultrasonic sensors use sound waves but can sometimes activate from inanimate movements like curtains swaying. Dual-technology sensors combine two methods, reducing false alarms but requiring more intricate calibration to harmonize the two detection modes.
When calibrating a motion sensor light, testing in real-life scenarios is essential. This includes simulating typical user activities such as walking along a pathway, approaching the door, or entering a room at various times of the day. Observations during these tests provide immediate feedback on whether the sensor settings meet expectations. Adjustments based on these tests are the most reliable way to optimize calibration for convenience and security. It’s important to repeat testing under various conditions, including different speeds of movement, multiple occupants, and changing environmental factors, to ensure robustness.
Additionally, it’s beneficial to document calibration settings and observations. This record helps in troubleshooting, future adjustments, or when replicating similar setups in new locations. Consistent documentation aids in identifying patterns such as recurring false activations during specific times or weather conditions, which can then inform more sophisticated calibration strategies, like time-based sensitivity settings or adaptive trigger thresholds.
Energy efficiency is a prime concern in the design and operation of motion sensor lighting systems. Proper calibration directly influences energy consumption by reducing unnecessary activations and optimizing lighting duration. In commercial or large residential applications, fine-tuning a fleet of motion sensor lights can result in significant cost savings and a reduced carbon footprint. Furthermore, energy efficiency aligns with broader sustainability goals, making calibration not just a technical necessity but an environmental responsibility.
Advances in smart technology have brought new capabilities to motion sensor lights, including integration with home automation systems and the Internet of Things (IoT). These systems often allow remote calibration and real-time adjustments via smartphone apps or centralized control panels. Such features enable users to monitor sensor performance continuously and tweak settings instantly in response to changing conditions or user requirements. Incorporating these advanced functions requires understanding the calibration fundamentals but can streamline maintenance and enhance overall system effectiveness.
Despite the technical nature of motion sensor light calibration, it is an accessible task for most property owners or maintenance personnel with guidance and patience. Manufacturer manuals often provide baseline calibration instructions tailored to the specific sensor model. However, a personalized calibration adjusted to the unique environmental and usage context will always yield better performance. Even professional installers must follow up with on-site calibration post-installation to ensure the sensor light meets the intended functional criteria.
Common calibration errors include setting sensitivity too high, neglecting to adjust time delays, improper sensor placement, and ignoring ambient light conditions. Addressing these errors early can prevent frustration and costly replacements. Regular review and recalibration may be necessary as environmental conditions or usage patterns change over time, ensuring continued optimal operation.
In conclusion, motion sensor lights are invaluable devices for enhancing security and convenience, but their full potential is realized only when carefully calibrated. Calibration is a multifaceted process that involves adjusting sensitivity, timing, detection zones, and ambient light thresholds, all while considering environmental influences and sensor technology types. This detailed fine-tuning maximizes sensor reliability, energy efficiency, and user satisfaction. Whether for home security, commercial safety, or energy conservation purposes, investing time and effort into precise calibration ensures that motion sensor lights perform exactly as expected, illuminating pathways and protecting properties with minimal waste and maximum effectiveness.